If you happen to follow me over on Pinterest, you may have noticed that over the past few weeks I have been pinning a lot of natural pond content to my Gardening board. The reason for this is that I have been contemplating different ways in which I could attract frogs and toads to the little ecosystem surrounding my house while also figuring out ways in which I could supply water to the local wildlife. I've set out some shallow plates with rocks and water in the areas I see bees and butterflies the most, but this wasn't feeling like enough.

Image Via Pinterest
So, I began looking around the house to see where I could potentially place a small pond, fit for wildlife. It took me a long long while to realize that the area I had been dubbing the "Shade" garden for the past two years had ample room to house a little pond, along with a wildflower garden filled with native plants! It seemed like the perfect match!

With the idea coming together in my head (and via Pinterest), I felt myself getting more and more excited to get started on this project. It didn't take much to convince my husband of tackling this idea (once I re-assured him that I would be ultra careful about digging so close to our house, for fear of hitting a wire or pipe or something).
Now, it is my hope to take you along on my pond making journey! I have only just started and already I am having a blast with this entire project. If all goes well, it is my hope to have the pond completed before the fall.
Overview
For this pond, I debated a lot between whether to create a 100% natural pond -- lined with clay rather than a man-made liner -- or to opt for a rubber liner. In the end, I chose to do a rubber liner mainly because of how close the pond will be to our house. Thankfully, we don't have a basement or anything like that to worry about, just a concrete foundation. Regardless, a rubber liner seemed to be the best option seeing as the pond is only 6 feet (1,8 metres) from the edge of our home.
As for everything else, I do want to keep this pond as close to natural as possible, relying on developing a micro-ecosystem to help keep the water clean, mosquitoes at bay, and thriving plant life! That means I will not be adding any sort of pumps to this pond. Instead, I plan to eventually add small fish, loads of water loving plants, and possibly a solar powered floating fountain, as I've read birds find moving water irresistible!
With all of my ideas in place, I created a brief checklist of what I thought would need to happen in order to make this pond a reality:

Day 1 : Marking + Leveling
For my first day of pond work, I set about to mark the general shape of the pond in relation to the plants and structures that were already present in the area. To mark the pond, I simply drew an organic shape with the back end of a shovel into the existing mulch. Then I used a rake to clear out the mulch inside the shape. This gave me a better idea of what the pond would look like in the end.
 While I was clearing, I also went ahead and marked off a winding path to our garden hose. This is the only hose in our backyard and I wanted to ensure we could access it easily even after this space is filled to the brim with wild flowers!
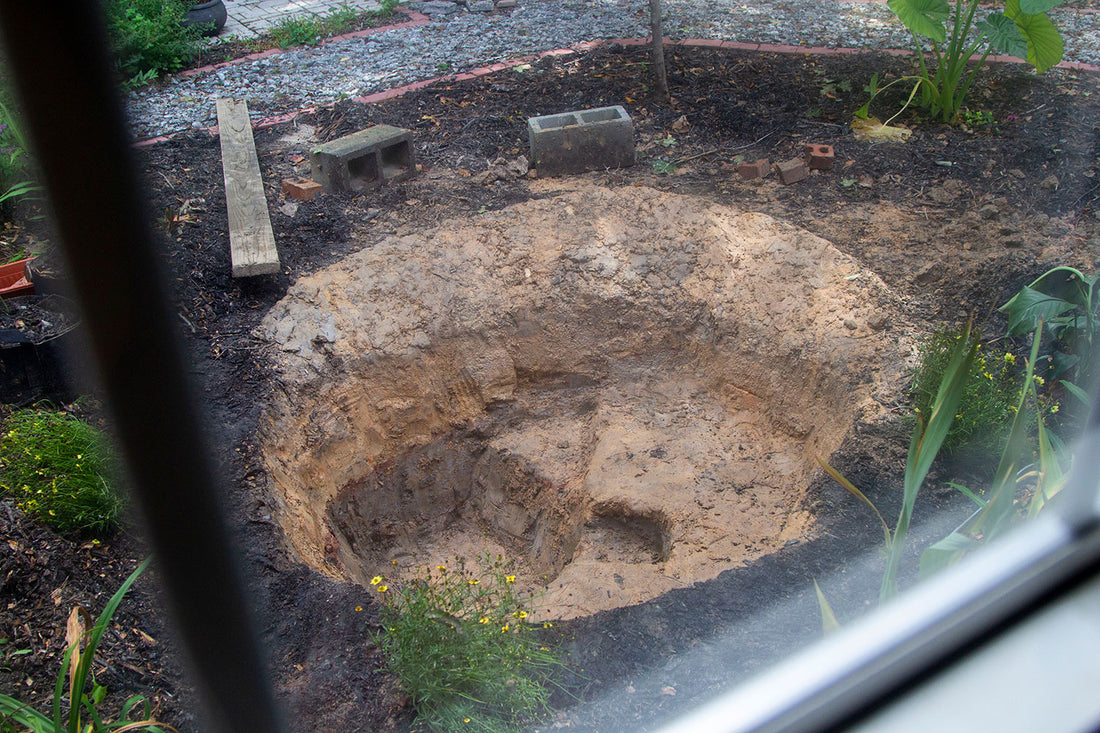
Once I had tweaked the shape of the pond to my liking, I began the process of leveling the edges. We have a pretty dramatic slope to our yard (both front and back!) so I knew the pond side closest to the house would be much higher than the pond side that was closer to our fire pit area.
 The pergola wall in the background gives a good indication of how steep of an angle our backyard has just at the top of the hill nearest our home. It gets steeper as you go further into the yard.
To find the correct level, I placed a long board across the entire pond space with a level directly on the board. Then I stacked whatever I could find (bricks + cinder blocks mostly) until the level was... level 😅.

Once I had my sides marked with bricks and cinder blocks, I began moving some dirt around to build up the lower side of the pond. I tried my best to create a gentle slope on the side I was building up as I wanted to have a "beach" area for any wildlife that has trouble swimming to be able to access the water without fear of drowning.

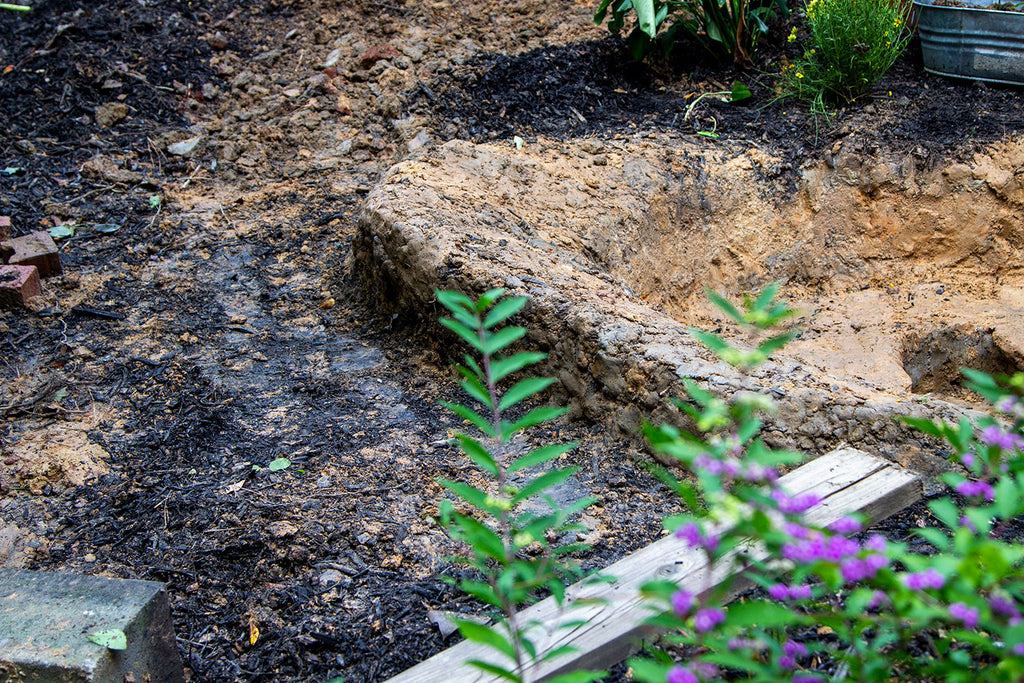

 This area will need to have some sort of retaining wall to help not only keep the pond liner in place but also keep the new slope propped up! We have decided to work with a beautiful grey brick to build up our wall, which I will share in a future post.
Days 2 - 5 : Creating the Pond Shelves
The next couple of days were filled with lots and lots and lots of digging and moving dirt around the yard. I am very thankful that most of my garden beds needed a top up of soil, otherwise, I am not sure where I would have put all the soil that I dug up! I mean... every post I read about ponds said there would be loads of soil that I would need to do something with, but I honestly hadn't realized just how much those articles were talking about until I was carting wheelbarrow after wheelbarrow away.
I worked on the pond in layers, making sure that each new shelf I dug was fairly level before moving on to the next. In the end, I wound up with:
- A gently sloping beach
- A shelf 12" (30,5 cm) deep, perfect for some plants
- A shelf 24" (61 cm) deep, enough for fish to take shelter in case the weather dips below freezing
- A little cave near the bottom for the fish to hide from predators


Now that all the digging is complete, it's time to begin layering the pond with a variety of materials, including the pond liner and rocks! EEEP! It's already coming together so quickly!
To check out Part 2, click HERE.
2 comments
Hi May!
Yes! Thank you so much for pointing this out to me. I do have Part 2 already up and waiting. I had forgotten to link the two together, but have done so now. Thank you for asking and reminding me. If you’d like to read part 2 of this mini series, you can check it out here: https://untitledthoughts.com/blogs/garden/building-a-wildlife-pond-part-2
PS—I tried to email all this information to you as well but my message was returned. I hope you see this and are able to go through the remainder of this series.
I wonder if you ever posted part 2 cause I cannot find it?? Hope the project went well!!